Hey there, coffee aficionados! If you’ve ever sipped a velvety, frothy cappuccino and wondered, “How do they create that luscious foam?”—you’re in for a steamy treat! Today, we’re diving deep into the world of coffee alchemy, where we unlock the secrets of the mystical “Steaming Wand.”
Picture this: You’re cozied up in your favorite café, and a barista works their magic with a metal wand, transforming ordinary milk into a creamy cloud that dances atop your espresso. It’s like a magic trick for your taste buds! But guess what? You don’t need a wizard’s hat or a cauldron; you only need a steaming wand and a little know-how.
In this caffeinated adventure, we will demystify the espresso machine steaming wand, making it your trusty sidekick on your journey to coffee perfection. From understanding the basics to creating luscious microfoam and crafting that perfect cappuccino, we’ve got it all covered.
So, if you’re ready to brew some coffee magic and become your own barista extraordinaire, grab your favorite coffee mug, and let’s start frothing up some goodness! But first, let’s unravel the enigma of the steaming wand and why it’s your key to coffee nirvana.

What is the Steaming Wand?
Picture it as the conductor’s baton in your coffee symphony, the magic wand that turns ordinary milk into a frothy masterpiece. At its core, the steaming wand is a small but mighty tool typically found on espresso machines. It comprises a metal rod with a steam nozzle attached – the gateway to transforming milk into silky microfoam. It’s like having your very own cloud factory right at your fingertips!
But hold onto your coffee cups, my friends, because there’s more to it than meets the eye. The steaming wand isn’t just about creating foam; it’s about temperature control, aeration, and the delicate art of texture. It’s the difference between a lackluster latte and a cappuccino that dreams are made of.

Reasons You Need to Know the Steaming Wand
Alright, fellow coffee enthusiasts, it’s time to spell out why mastering the steaming wand is a non-negotiable skill for any serious coffee lover. Grab your mugs, because we’re about to brew up some convincing reasons!
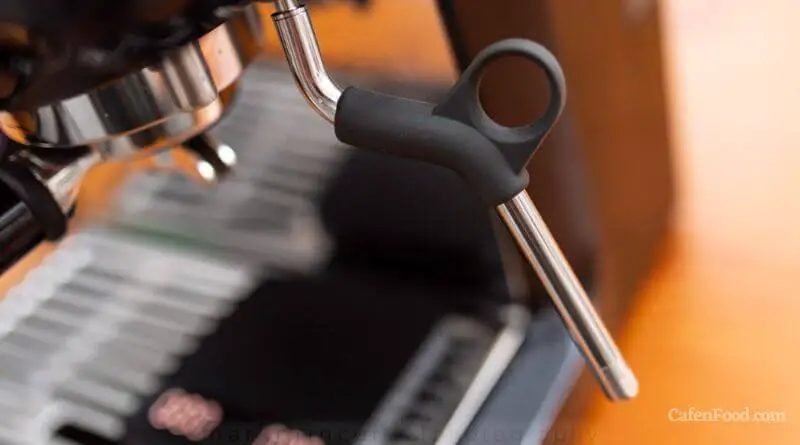
- Texture is King: Ever sipped on a latte with a flat, lifeless layer of milk? Not exactly the stuff of coffee dreams, right? The steaming wand is your ticket to creating luxurious, velvety microfoam that elevates your coffee to a whole new level. Say goodbye to mediocre milk, and hello to coffee that feels like a warm, comforting hug.
- Artistry in Your Hands: Coffee is more than just a drink; it’s an art form. With the steaming wand as your brush, you can create intricate latte art, turning your morning brew into a masterpiece that’s as Instagram-worthy as it is delicious. Impress your friends and elevate your home coffee game to a whole new level.
- Temperature Control: The steaming wand isn’t just about froth; it’s also your thermostat. Achieving the perfect milk temperature is crucial for flavor balance. Too hot, and you scorch the milk; too cold, and it falls flat. With the steaming wand, you become the coffee maestro, hitting that sweet spot every time.
- Versatility Galore: Beyond cappuccinos and lattes, the steaming wand opens the door to a world of coffee creativity. From macchiatos to cortados, it’s your Swiss Army knife for crafting a variety of coffee concoctions. You’ll never be limited to a single brew again.
So there you have it – four rock-solid reasons why the steaming wand deserves a prime spot in your coffee arsenal. But that’s just the beginning.
Step-by-Step Instructions to Master the Steaming Wand
Welcome back, coffee comrades! You’ve learned why the steaming wand is a must-have in your coffee toolkit. Now, it’s time to roll up those sleeves and get hands-on with this caffeinated wizardry.
In this section, we’re diving deep into the step-by-step process of wielding the steaming wand like a true coffee sorcerer. From the moment you turn on the machine to the final flourish of latte art, we’ve got you covered. So, without further ado, let’s brew up some magic!
Step 1: Preheat and Purge
- First things first, make sure your espresso machine is properly heated.
- Run a short burst of steam to purge any residual water from the wand. Trust us; you don’t want unexpected liquid surprises in your milk.
Step 2: Choose Your Milk
- Select your milk of choice. Whole milk for creamy richness, skim milk for a lighter froth, or non-dairy alternatives for a vegan twist.
- Pour the desired amount into a cold, stainless steel pitcher.
Step 3: Position and Submerge
- Position the steam wand tip just below the milk’s surface, creating a slight angle.
- Submerge the wand and turn on the steam. You’ll hear a hiss, indicating the magic has begun!
Step 4: Texture Time
- As you steam, focus on two key elements: aeration and temperature.
- Keep the wand near the surface for aeration, introducing air into the milk to create those lovely bubbles.
- As the milk heats, lower the wand deeper to continue heating without excessive froth.
Step 5: Monitor Temperature
- Keep an eye on the milk’s temperature with a thermometer. The sweet spot is around 150-155°F (65-68°C).
- Once you hit the target temperature, turn off the steam and remove the wand.
Step 6: Tap, Swirl, Pour
- Give the pitcher a gentle tap on the countertop to pop any large bubbles.
- Swirl the milk to create a smooth, velvety texture.
- Now, it’s time for the pièce de résistance – pouring that dreamy microfoam onto your espresso.
Step 1 – Preheat and Purge
Now that we’ve kicked off our journey into mastering the steaming wand, it’s time to dive deep into the details, starting with Step 1: Preheat and Purge. This is where the magic begins, so pay close attention, and you’ll be on your way to frothy perfection!

Preheat and Purge? What’s That About? Think of your espresso machine as a trusty steed, and the steaming wand as your lance. Just as a knight needs a well-prepared horse before battle, you need to prep your machine before frothing. Here’s how:
- 1. Fire Up the Machine: Turn on your espresso machine and give it a few moments to heat up. We’re talking the right kind of hot, like a dragon’s breath!
- 2. Purge the Wand: Before we dive into milk frothing, we need to clear any water that might be lingering in the wand. Place a container under the wand, and with the steam knob open, let it hiss and spit until you see a steady stream of steam.
- 3. Ready, Set, Steam: With your machine preheated and your wand purged, you’re now armed and ready to create some coffee magic.
Mastering this first step ensures your milk frothing journey begins on the right foot. It sets the stage for achieving that creamy, dreamy microfoam that’s essential for top-notch cappuccinos and lattes.
Step 2 – Choose Your Milk
Now that we’ve warmed up our espresso machine and purged the wand, it’s time to dive into the second step of mastering the steaming wand: “Choose Your Milk.” Get ready to explore the wonderful world of milk options and how they can influence your coffee creations.
The Milk Quest Begins: Choosing the right milk isn’t just about personal preference; it’s about creating the perfect canvas for your coffee artistry. Here’s how to make the best choice:

- 1. Whole Milk: If you’re after a creamy, rich texture and flavor that hugs your taste buds like a cozy blanket, whole milk is your go-to. It creates a velvety microfoam that’s ideal for classic cappuccinos.
- 2. Skim Milk: For those who prefer a lighter touch, skim milk offers a froth that’s airy and less calorie-heavy. It’s excellent for achieving a light, delicate foam for lattes.
- 3. Non-Dairy Delights: Vegans and lactose-intolerant coffee lovers, rejoice! Non-dairy alternatives like almond, soy, or oat milk can create equally delightful froth. Experiment with different options to find your favorite.
- 4. Temperature Matters: No matter which milk you choose, remember that milk froths best when it’s cold. So, keep your milk chilled until you’re ready to steam it to perfection.
Step 3 – Position and Submerge
We’re sailing through the seas of coffee wisdom on our quest to master the steaming wand, and today, we’re anchoring at Step 3: “Position and Submerge.” This step is where the rubber meets the road, or rather, where the wand meets the milk. Get ready to immerse yourself in the art of precise positioning!
Navigating the Wand: Creating that perfect frothy goodness starts with the proper positioning of your steaming wand. Here’s how to set your course:
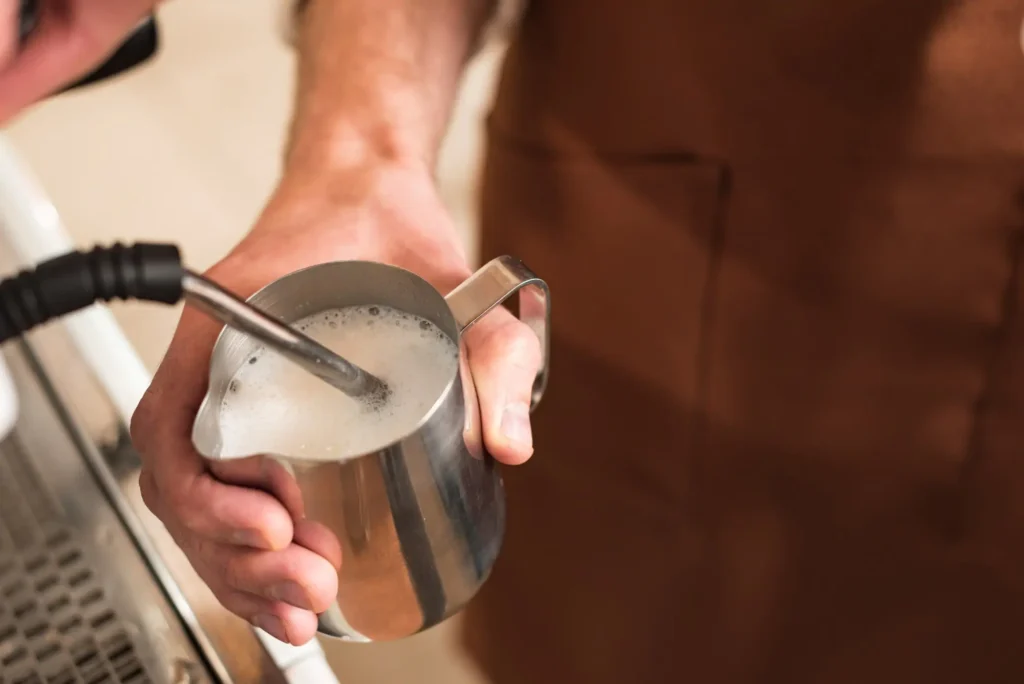
- 1. Angle is Key: Hold your steam wand at a slight angle just below the surface of the milk. Think of it as a submarine periscope exploring the depths of dairy.
- 2. Submerge Gracefully: Slowly submerge the wand into the milk while it’s cold. The initial hiss and swirl of steam indicate that the transformation is underway.
- 3. Steam Power: Turn on the steam, and you’ll see the milk start to dance. This is where the magic happens – the introduction of steam into the milk creates the microfoam we crave.
- 4. Vortex Formation: Keep an eye on the milk’s movement. You want a gentle whirlpool effect, not a violent tornado. This ensures even heating and frothing.
- 5. Textured Nirvana: As the milk heats and froths, you can lower the wand deeper into the pitcher to continue heating without excessive aeration. This is where you have control over the texture of your microfoam.
Step 4 – Texture Time
As we continue our journey through the realms of coffee alchemy, we find ourselves at the heart of the matter – Step 4: “Texture Time.” This is where the steaming wand truly reveals its enchanting powers. Get ready to master the art of creating silky, velvety microfoam! ☕🪄🎨
Texture: The Heart of Frothy Goodness: Now that your steaming wand is submerged in milk and merrily hissing away, it’s time to focus on texture, the essence of any top-notch coffee creation. Here’s how to make it happen:

- 1. Aeration vs. Temperature: As you continue steaming, you have control over two essential elements – aeration and temperature. The wand’s position determines whether you introduce more air into the milk or focus on heating it further. Keep it near the surface for more air and lower for more heat.
- 2. Whirlpool Wizardry: Keep an eye on the whirlpool effect in the milk. This gentle vortex ensures even distribution of heat and foam throughout the milk.
- 3. Sensory Check: Pay attention to the milk’s texture through the pitcher. You’re aiming for a glossy, wet-paint look with fine, micro-sized bubbles. It should resemble wet latex paint, not soap suds or large, airy bubbles.
- 4. Temperature Sweet Spot: Keep a thermometer handy. The ideal milk temperature for most coffee creations is around 150-155°F (65-68°C). Achieving this sweet spot ensures your milk complements your espresso, enhancing the overall flavor profile.
- 5. Multi-task Magic: While you’re focusing on texture, don’t forget to multitask. Keep an eye on the milk’s temperature, so it doesn’t exceed the desired range. Once you reach the perfect texture and temperature, turn off the steam and remove the wand.
Perfecting the texture of your frothed milk is like findin
Step 5 – Monitor Temperature
As we sail through the seas of coffee enchantment, we’ve reached the critical checkpoint – Step 5: “Monitor Temperature.” This step is all about keeping a close eye on the heat of your milk as you work your steaming wand magic. Get ready to master the temperature for that perfect cup!
The Temperature Tightrope: Creating that perfect cup of coffee is a delicate balance of flavors, and the milk’s temperature plays a vital role. Here’s how to walk the temperature tightrope with finesse:

- 1. Thermometer Tidings: Your trusty thermometer is your best friend during this step. Dip it into the milk to monitor its temperature throughout the steaming process.
- 2. The Sweet Spot: For most coffee creations, including cappuccinos and lattes, the ideal milk temperature is around 150-155°F (65-68°C). This range ensures that the milk complements the espresso’s flavor without overshadowing it.
- 3. Steaming Steadiness: Keep the steam wand at a steady pace, adjusting the depth as needed to maintain the desired temperature. The goal is to heat the milk evenly without going too hot too quickly.
- 4. Keep Watch: As you steam, watch the thermometer’s magic numbers. Once you approach the sweet spot, be ready to turn off the steam and remove the wand promptly.
- 5. Temperature Maintenance: After turning off the steam, give the milk a gentle swirl to distribute the heat evenly. This prevents overheating and ensures a consistent temperature throughout the milk.
Key Considerations For Successfully Frothing Your Milk
While we’ve covered the step-by-step process of wielding the wand, there are some nuances and insights that didn’t quite fit into the previous steps. So, grab your coffee mug, and let’s explore these essential tips and tricks:

- 1. Quality Matters: The quality of your milk plays a significant role in the final product. Opt for fresh, high-quality milk for the best results. Remember, great coffee starts with great ingredients.
- 2. Pitcher Power: The type of pitcher you use can affect your frothing experience. A stainless steel pitcher is the preferred choice as it helps conduct heat evenly and creates a smooth microfoam.
- 3. Cleanliness is Key: Ensure that your steam wand is clean before and after each use. Lingering milk residues can lead to off-flavors and affect frothing performance.
- 4. Practice Patience: Steaming milk is an art that requires practice. Don’t be discouraged if your first attempts aren’t perfect. With time, you’ll become a frothing virtuoso.
- 5. Milk Art Mastery: Once you’ve nailed the basics, don’t hesitate to venture into latte art. A steady hand and some creativity can turn your daily brew into a work of art.
- 6. Experiment and Enjoy: Coffee is an adventure, so don’t be afraid to experiment. Try different milk types, temperatures, and techniques to discover your personal frothing style.
These considerations are like the secret ingredients that take your coffee creation from good to exceptional. They’re the fine-tuning that ensures each sip is a delight to your senses.
Alternatives to the Steaming Wand
While the steaming wand is the go-to choice for creating microfoam, there are situations where you might not have access to one. Fear not, for coffee lovers are resourceful beings, and there are alternative methods to achieve that creamy froth:
The French Press Froth:
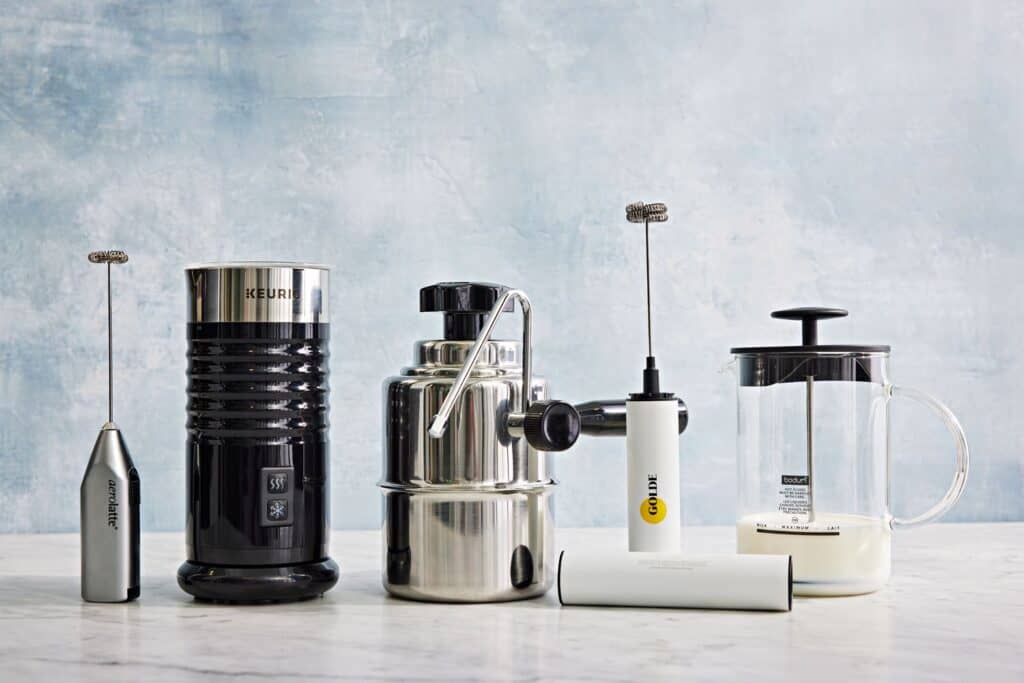
Pour hot milk into a French press, ensuring it’s filled no more than a third of the way. Plunge the press repeatedly until the milk expands and becomes frothy. This method is great for creating foam without specialized equipment.

Handheld Frothers:
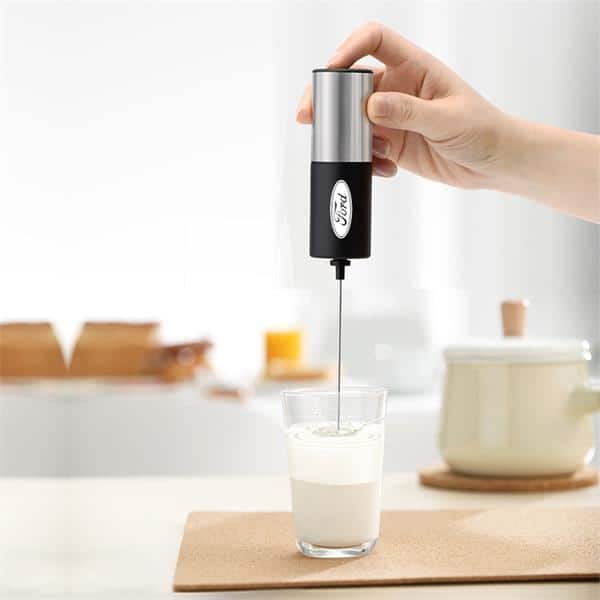
Invest in a handheld milk frother. These nifty gadgets are affordable and can create decent froth in a pinch. Simply heat your milk separately and froth it with the handheld device.
Electric Frothers:
Electric milk frothers are another convenient option. These machines both heat and froth the milk, making them a great choice for those who crave convenience.
Latte Whisks:
Specialized latte whisks feature a spiral whisking head that creates froth when submerged in hot milk. They are a simple and effective alternative.

Stovetop Frothing:
Heat your milk on the stovetop while whisking vigorously. This method can create a frothy texture, although it may not achieve the same microfoam quality as a steaming wand.
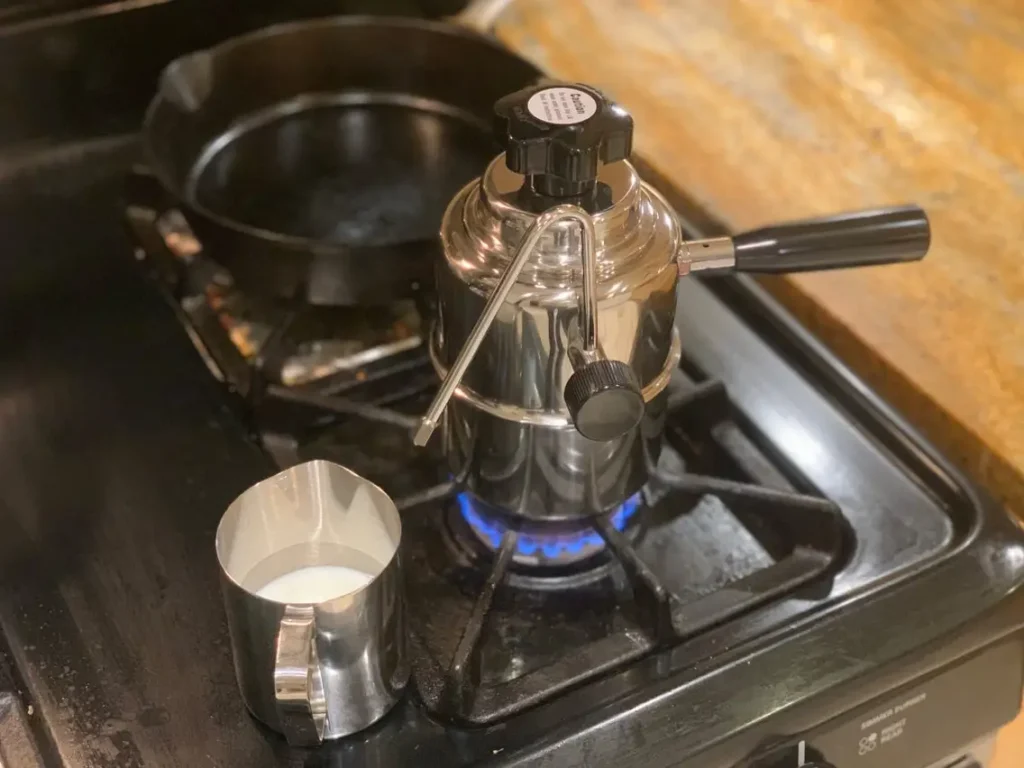
Remember, while these alternatives can produce frothy milk, they may not match the precision and texture you can achieve with a steaming wand. But in a pinch or for those without an espresso machine, they can be a lifesaver.
In our grand finale, we’ll wrap up our steaming wand adventure with a summary of what we’ve learned and my personal experiences with this magical tool. Stay tuned, my coffee comrades, and keep those creative coffee juices flowing!
Wrapping Up
As we conclude our steaming wand odyssey, it’s crucial to summarize what we’ve learned and celebrate the journey we’ve taken together. Here’s a quick recap of our caffeinated expedition:
- We embarked on this journey to demystify the steaming wand, understanding its role in creating coffee magic.
- We explored the step-by-step process of frothing milk, from preheating to monitoring temperature.
- We delved into the nuances, tips, and tricks that elevate your coffee creations to new heights.
- We ventured beyond the basics, exploring flavor experiments, latte art, and coffee pairings.
- We discovered alternative methods for frothing milk when the steaming wand isn’t available.
Now, let me share a bit about my own experience with the steaming wand. As a coffee enthusiast, I’ve had my fair share of ups and downs with this magical tool. Like any skill, mastering the steaming wand takes practice. I’ve had moments where my milk turned into a bubbly disaster, and others where I created lattes that could rival any café’s offerings.
What I’ve found most rewarding is the sense of accomplishment that comes with crafting the perfect cup of coffee. There’s something truly magical about being able to control the texture and temperature of your milk, turning it into a canvas for latte art or simply achieving that luscious microfoam.
Through this journey, I’ve not only honed my coffee-making skills but also deepened my appreciation for the artistry and craftsmanship that go into a great cup of coffee. It’s a testament to the fact that coffee isn’t just a beverage; it’s an experience, a form of self-expression, and a delightful journey of the senses.
As we bid adieu to our steaming wand adventure, I encourage you to embark on your coffee odyssey with newfound confidence. Whether you’re crafting lattes for friends, experimenting with flavors, or simply savoring your morning brew, remember that the steaming wand is your trusty sidekick, ready to turn ordinary milk into frothy goodness at your command.
So, my fellow coffee adventurers, go forth with your steam wands, your creativity, and your love for coffee. May your cups be always full, your foam be ever frothy, and your coffee journey filled with endless delight. Until next time, keep sipping and smiling!
Disclosure: Our blog contains affiliate links to products. We may receive a commission for purchases made through these links. However, this does not impact our reviews and comparisons. We try our best to keep things fair and balanced, in order to help you make the best choice for you.

