
Finding the best espresso maker for backpacking isn’t just about picking the lightest option on the shelf — it’s about balancing brew pressure, pack weight, durability, and the very real question of whether you’ll actually use it at 6,000 feet after a 12-mile day. We’ve tested and researched the top portable espresso options so you don’t have to guess at the trailhead.
For the complete picture, see our Best Portable Espresso Makers: Complete Guide 2026.

The backpacking coffee space has exploded since 2022. Ultralight hikers who once settled for instant coffee packets are now demanding real espresso extraction on multi-day trips. That shift has pushed manufacturers to engineer some genuinely impressive gear — and created a lot of noise that makes choosing hard.
This guide cuts through that noise with specific measurements, real-world comparisons, and the kind of nuanced advice you won’t find in a five-minute listicle.
What Makes the Best Espresso Maker for Backpacking Different From Home Machines?
The Pressure Problem in Portable Brewing
Home espresso machines generate 9 bars of pressure — that’s the industry standard for proper espresso extraction. Most portable devices can’t hit that number without a power source, which is exactly what you don’t have on the trail. The best backpacking options work around this constraint in clever ways.
Manual lever devices like the Wacaco Nanopresso generate pressure through hand pumping, reaching up to 18 bars of manual pressure. Aeropress-style brewers use a slower, lower-pressure plunge — typically 0.35 to 0.75 bars — which produces a concentrate that resembles espresso but is technically a different extraction. Knowing this distinction matters if you’re serious about cup quality.
The tradeoff is always the same: more pressure requires more mechanism, which means more weight and more potential failure points. A thoughtfully engineered backpacking espresso maker accepts this tradeoff gracefully rather than pretending it doesn’t exist.
Weight, Volume, and the Pack Space Equation
For backpacking, every ounce is a negotiation. Here’s how the major categories break down by average weight:
| Device Type | Average Weight | Pressure Range | Best For |
|---|---|---|---|
| Manual Piston (e.g., Nanopresso) | 336g / 11.8 oz | Up to 18 bar | True espresso seekers |
| Aeropress / Prismo | 250g / 8.8 oz | 0.35–0.75 bar | Ultralight minimalists |
| Moka Pot (titanium) | 170g / 6 oz | 1.5–3 bar | Stove-dependent campers |
| Hand Pump (e.g., Cafflano Kompresso) | 192g / 6.8 oz | Up to 9 bar | Balance of weight and quality |
Volume also matters. If you’re a solo hiker, a 1-shot capacity is fine. Group trips above three people make individual portable espresso makers impractical — consider a lightweight percolator instead and manage expectations around espresso.
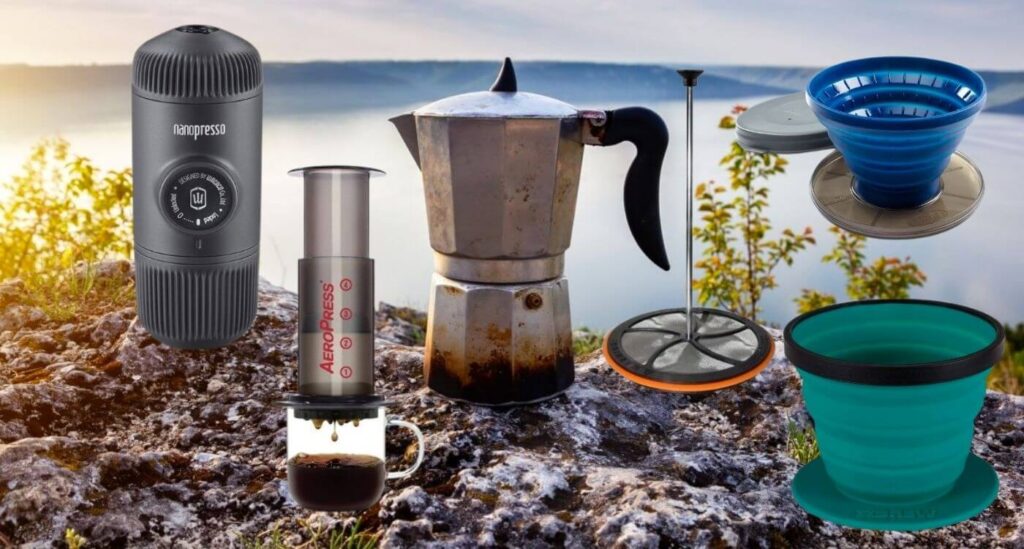
Top Picks: Best Espresso Maker for Backpacking in 2026
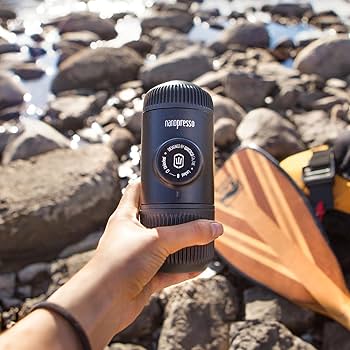
Wacaco Nanopresso — The Gold Standard for Portability
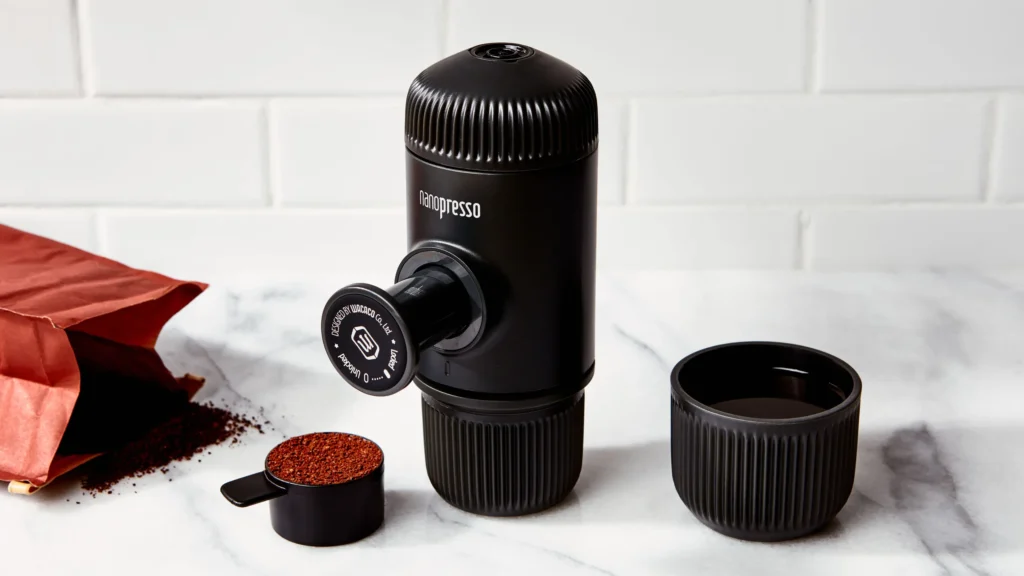
The Wacaco Nanopresso remains the benchmark when evaluating the best espresso maker for backpacking. It weighs 336 grams, measures 17.4 cm long, and genuinely produces crema — that orange-brown layer of emulsified oils that signals proper extraction. That’s not marketing language; it’s physics working correctly at 18 bars of manual pressure.
Related reading: Wacaco Nanopresso Review.
The pump mechanism requires about 16–18 downward strokes per shot. It sounds tedious until you realize the whole process takes under 3 minutes and you’re doing it at sunrise with a mountain view. The NS Adapter accessory lets you use Nespresso-compatible pods, which is brilliant for long trips where grinding isn’t practical. Check the full spec sheet on the Wacaco official product page before purchasing.
One real limitation: water temperature matters enormously. Nanopresso shots extracted with water below 85°C produce flat, underwhelming espresso. Bring water to a full boil, wait 30 seconds, then load the device. That single tip is worth more than most full reviews on this device.
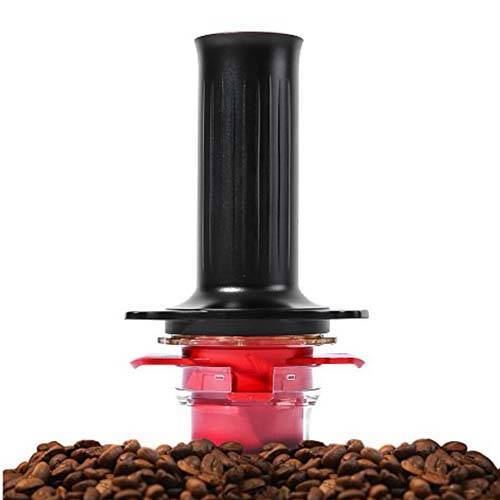
Cafflano Kompresso — The Underrated Contender
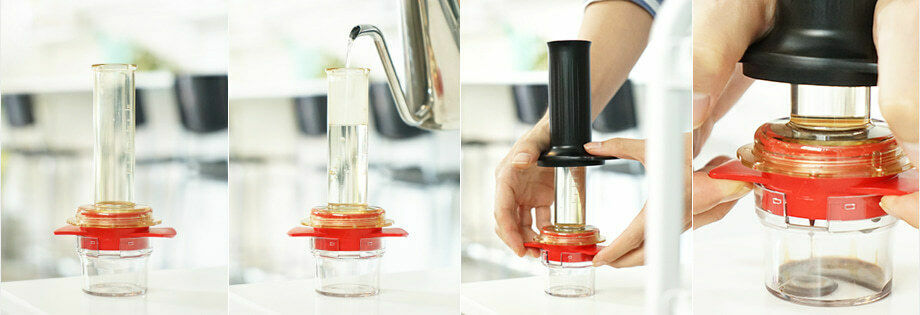
The Cafflano Kompresso is criminally underrated in the backpacking espresso conversation. At 192 grams, it’s nearly 150 grams lighter than the Nanopresso and still achieves up to 9 bars through its vertical lever-compression system. That’s enough pressure for authentic espresso extraction with proper crema formation.
The design is brilliantly simple — a cylindrical tube with a press-down piston. There are no moving parts beyond the piston itself, which means almost nothing can break in the field. The 50ml brew chamber accommodates a single 7-gram dose comfortably, and the entire device nests inside a standard backpacking mug.
The grind size is more sensitive here than with the Nanopresso. You’ll want a fine espresso grind — around 200–250 microns — and consistent tamping pressure of approximately 15–20 kg. Sloppy prep produces channeling and weak shots. But when you dial it in, the Kompresso punches well above its weight class.
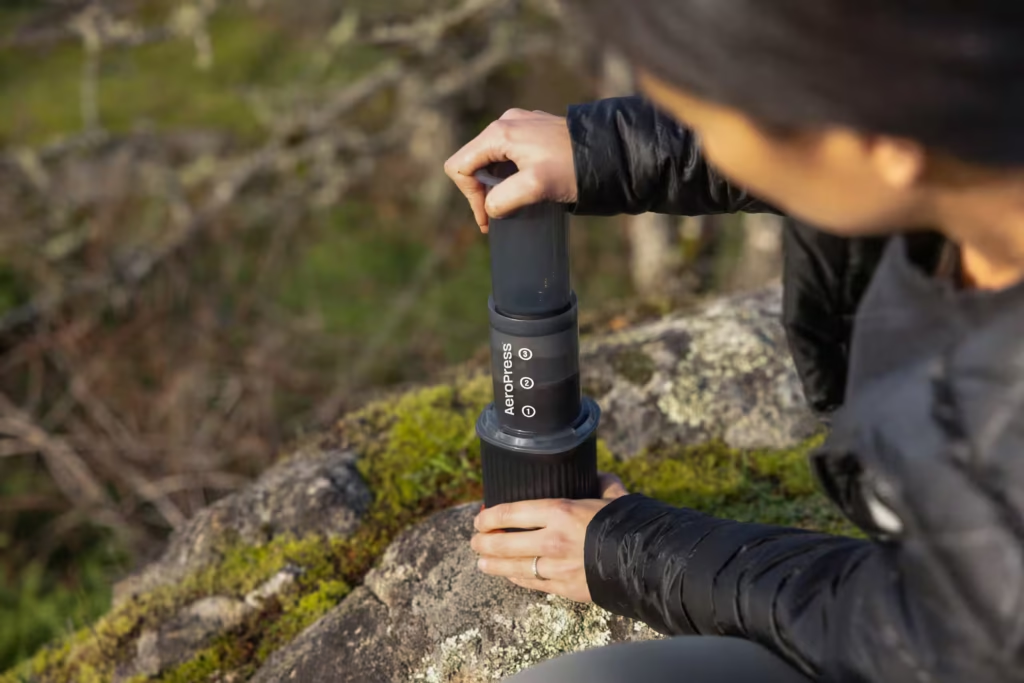
Aeropress Go — The Ultralight Pragmatist’s Choice
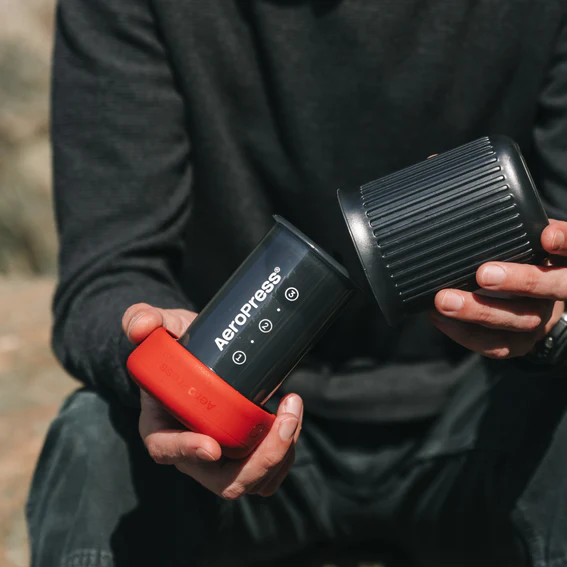
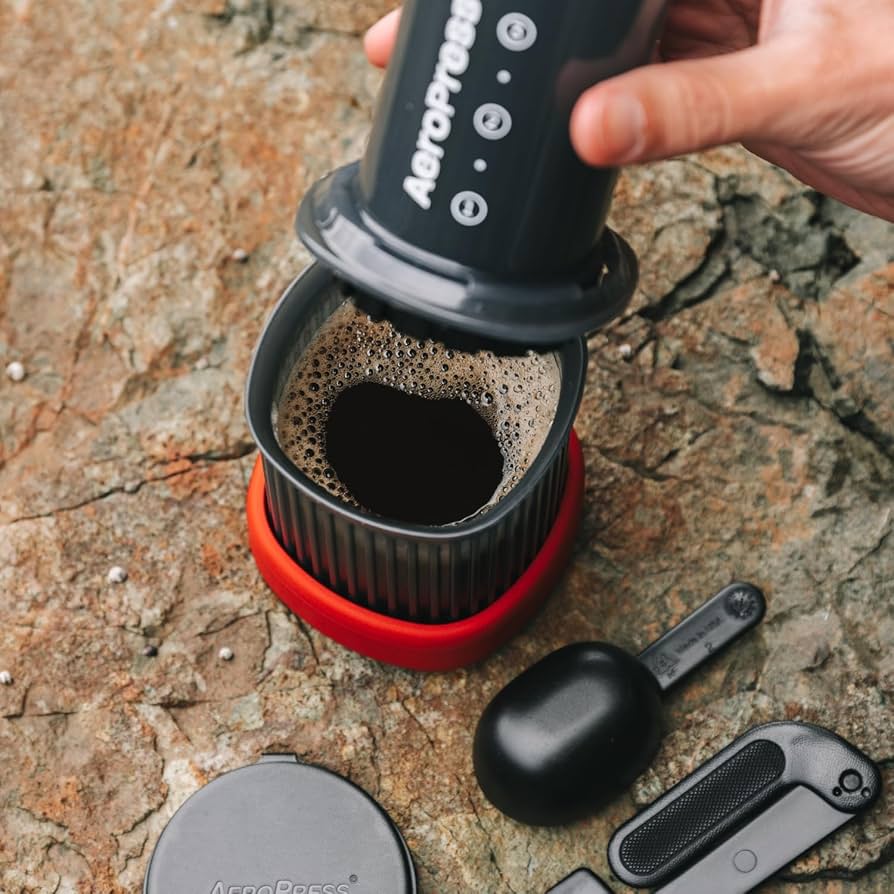
The Aeropress Go weighs 296 grams with its travel mug included, making it a strong all-in-one option. It won’t produce true espresso — the pressure tops out below 1 bar — but it makes an extraordinarily clean, low-acid concentrate that satisfies most people’s espresso cravings on the trail.
The real advantage is versatility. One Aeropress serves as your espresso maker, pour-over brewer, and cold brew tool depending on your recipe. For multi-week thru-hikes where space is premium, that flexibility is genuinely valuable. Use the inverted method with a fine-medium grind (around 400–500 microns), 15 grams of coffee to 50ml of water at 88°C, and press slowly over 30 seconds for best results.
If you’re committed to the espresso maker for backpacking category specifically, the Aeropress is an honest workaround rather than a true solution. Know what you’re getting into — and it’s still a fantastic product on its own terms.
Related reading: Wacaco Minipresso Review.
How Should You Choose Between These Options?
Matching Your Hiking Style to Your Brewing Method
Thru-hikers covering 20+ miles daily should prioritize the Cafflano Kompresso or Aeropress Go. The mental load of operating a more complex device after a big mileage day is real — simplicity wins when you’re exhausted. Both devices also pack efficiently in side pockets of most 40L+ packs.
Weekend warriors and shorter technical trips are where the Nanopresso shines. You have energy, you’re not watching every gram, and you actually want the ritual of pulling a real shot with genuine crema on a Saturday morning overlooking a lake. The espresso quality difference is noticeable enough to justify the extra weight for this use case.
Car campers and base campers have more flexibility. A titanium Moka pot like the Snow Peak Ti-Moka 2 (170g) can sit on a backpacking stove and deliver stovetop espresso-style coffee without any manual pumping. The pressure is lower (1.5–3 bar) but the process is hands-off once it’s on the flame, and the cleanup is minimal.
Fuel, Water, and Grind: The Supporting Gear That Makes or Breaks Trail Espresso
The best espresso maker for backpacking is only as good as the system surrounding it. Ignoring the supporting variables is where most trail coffee setups fall apart.
Water temperature is non-negotiable. Altitude affects boiling points — at 8,000 feet, water boils at approximately 91°C instead of 100°C. That’s actually close to ideal espresso extraction temperature (88–96°C), so high-altitude camping is genuinely great for trail espresso. Below 5,000 feet, let your boiled water rest 30–45 seconds before brewing.
Pre-grinding at home and packing in airtight single-dose bags is the practical move for most trips. Use 7-gram doses in small zip-seal bags — they weigh almost nothing and eliminate the need for a trail grinder. If you want fresh-ground on trail, the Comandante C40 MK4 is the gold standard among serious hikers, though at 320 grams it’s a commitment. The Kingrinder P1 (153g) is a more packable alternative with surprisingly good grind consistency for the weight.
Common Mistakes That Ruin Trail Espresso
Packing the Wrong Coffee
Whole bean coffee loses freshness faster than most people realize once opened. For trips longer than three days, pre-dose into nitrogen-flushed or tightly sealed small bags immediately after grinding. Stale coffee brewed at altitude tastes especially flat because the lower-pressure extraction already pulls fewer volatile aromatics.
Choose a medium-dark roast (Agtron 45–55 range) for best results in portable devices. Light roasts require longer extraction times and higher pressure to fully develop their flavor compounds — neither of which you have in abundance on a backpacking setup. A Brazilian or Colombian single origin in the medium-dark range tends to perform consistently across different portable brewing methods.
Skipping the Warm-Up
Metal-body devices like the Nanopresso and Kompresso absorb heat from your hot water. If you pour 88°C water into a cold device, you’ll lose 8–12°C to thermal mass before extraction begins. The fix is simple: run a quick rinse of hot water through the empty device before loading your coffee dose. This pre-warming step is the single most underused technique in portable espresso brewing.
Frequently Asked Questions
What is the best espresso maker for backpacking if I want real crema?
For genuine crema on the trail, the Wacaco Nanopresso or Cafflano Kompresso are your best options. Both generate enough pressure (9–18 bar) to emulsify coffee oils into the characteristic orange-brown foam. The Aeropress produces a concentrate but not true crema, since its pressure ceiling is too low for the required emulsification chemistry.
How much does a good backpacking espresso maker weigh?
Quality backpacking espresso makers range from 170 grams for a titanium Moka pot to 336 grams for the Nanopresso. The Cafflano Kompresso hits a sweet spot at 192 grams while still producing authentic espresso pressure. For ultralight hikers, anything over 300 grams starts requiring justification against the overall base weight budget.
Can I use a backpacking espresso maker at high altitude?
Yes — and altitude actually helps. Water boils at around 91°C at 8,000 feet, which falls squarely in the ideal espresso extraction temperature range of 88–96°C. Manual piston devices aren’t affected by atmospheric pressure since they generate their own. Moka pots may require slightly longer heat times due to the lower boiling point at elevation.
Is an Aeropress the same as an espresso maker for backpacking?
Not technically. The Aeropress generates 0.35–0.75 bar of pressure versus the 9 bar minimum for true espresso extraction. It makes a strong, concentrated brew that many people find satisfying as an espresso substitute, but it lacks the emulsified oils and mouthfeel of genuine espresso. For purists, devices like the Nanopresso or Kompresso are the correct category.
What grind size should I use for a portable espresso maker while backpacking?
For manual piston devices like the Nanopresso, use a fine espresso grind — approximately 200–300 microns, similar to table salt in texture. For the Aeropress, a slightly coarser grind around 400–500 microns produces better flow and avoids over-extraction. Pre-grind at home and pack in single 7-gram doses for convenience and consistency on the trail.
Final Thoughts
Choosing the best espresso maker for backpacking comes down to one honest question: what kind of hiker are you, and what are you actually willing to carry? There’s no wrong answer — only answers that don’t match your real priorities.
If true espresso with crema matters to you and you can absorb the extra weight, the Nanopresso is the right call. If you’re shaving grams and want functional strong coffee that gets you moving, the Kompresso or Aeropress Go serve beautifully. And if you’re base camping with a stove already packed, a titanium Moka pot delivers elegant simplicity at the lowest weight on the list.
What we know for certain is that the best espresso maker for backpacking is the one you’ll actually use — consistently, correctly, and with a little appreciation for the fact that you’re pulling shots in places most people never reach with a cup in hand. That combination of craft and wilderness is genuinely one of the better things in life. Don’t compromise on either side of it.